https://s3.amazonaws.com/lumberjocks.com/n5p0f30.jpg

If you have been waiting for the next instalment of this tutorial, I apologize for the delay!
This step is not absolutely necessary but I think it adds character to the finished flower.
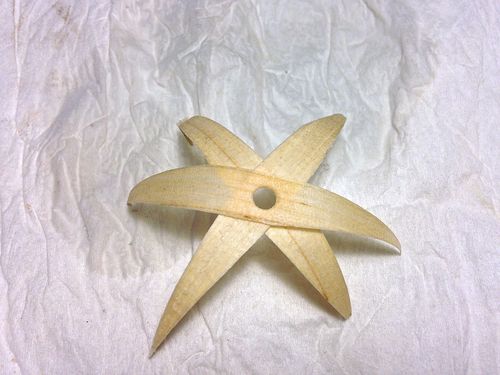
I create a star-shaped calyx by cutting three dart-shaped pieces from along the length of a shaving. These pieces are then soaked in water to encourage them to curl. With all three pieces placed with curls moving in the same direction, they can then be glued at the centre to form the calyx as shown below.
Once the glue is dry, a hole can be punched in the centre of the unit to enable the wire stem to pass through (I’ll describe that in Step 7). I use a leather punch but a paper punch would probably do or even a large nail set if care is taken. Use whatever tool you have that will make a clean hole.
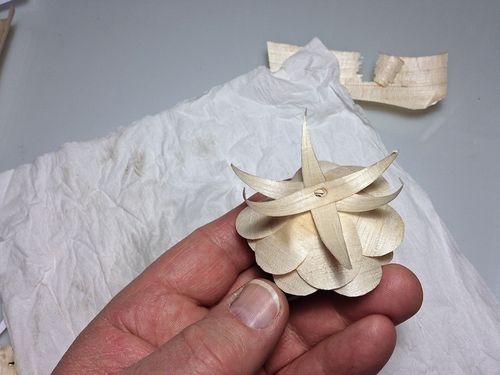
Before attaching the calyx to the petal assembly, I wet the completed calyx again so that it becomes pliable. CA glue works well to attach the calyx to the flower petals since water acts as a curing agent. I try to work the form of the calyx so that the central part assumes the form of the flower. The quick-setting CA glue is great for this procedure.
Source: LumberJocks.com
Making Wooden Flowers #6: Adding Sepals (the Calyx)
No comments:
Post a Comment