https://farm8.staticflickr.com/7444/13510076535_d405550957.jpg
Alright, my first blog entry ever. I’ve learned so much from so many here. Figured it’s my turn to hopefully help someone out there. I researched this topic extensively. There were similar things on LJ about this upgrade. But I found I wanted some more specifics as to how to hook up exactly before I purchased everything.
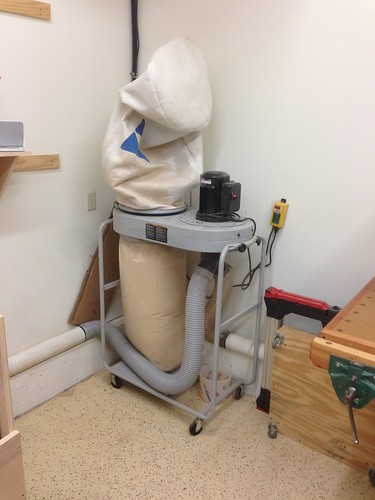
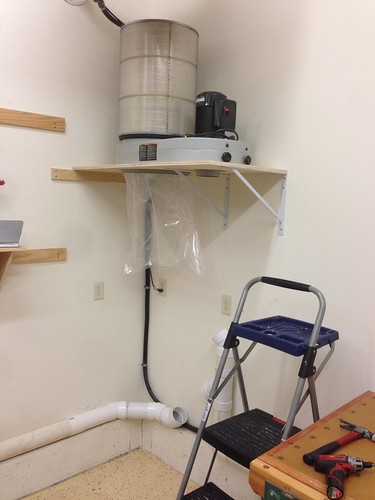
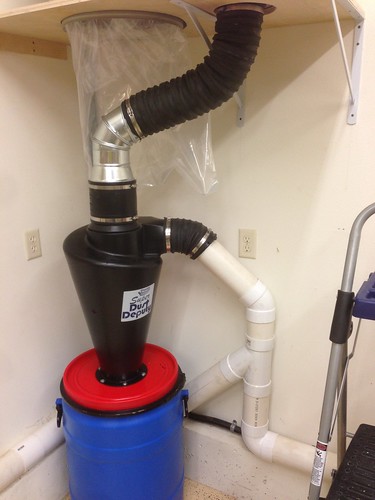
I have a Delta 50-760 DC. As you can kind of see in this image, my existing factory cloth bag has seen better days. It’s quite brown colored on the outside. I was going to order another one, until I came across people talking about the Wynn filters here on LJ. A little more snooping around on here and I came across people talking about the Super Dust Deputy (SDD). I was sold.
My existing DC sits in the corner of my shop. I have 4” S/D PVC piping to all my machines with blast gates. I control it with a remote that hangs on my apron. I only have one blast gate open at a time. (Also, a little disclaimer, I haven’t glued or taped a single connector in my whole DC pipe set up. Still have great performance. How do I know? Because most dust is gone at the tool. In my other house, I taped all connections. It was a pain to do, and a pain to change anything. This time, simpler was better. And easier/quicker to make changes to the DC runs now and in the future.)
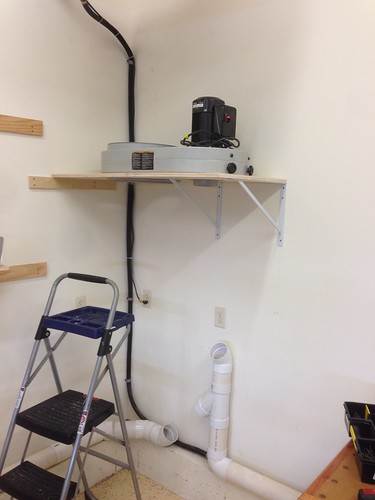
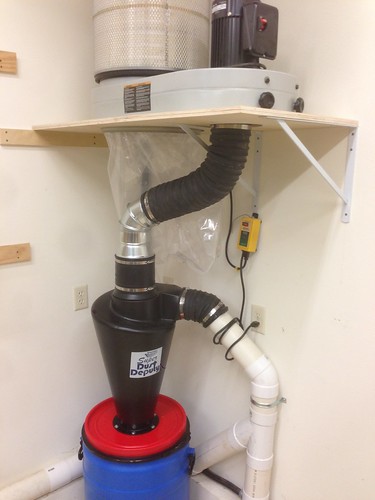
After finding and buying all the materials, I found that the SDD did not have the clearance to sit under the motor and on top of the container in the existing cart of the DC. I wanted to avoid having to enlarge my footprint of the DC unit by having the container/SDD sitting next to DC. I have very tall garage ceilings, so… up we go. My plan was to elevate the DC motor unit with the container/SDD unit sitting underneath it all.
First off, mounting the DC up in the air. Here’s the plywood shelf that I made so the DC motor unit will fit in. I had to add a little hole with a Forstner bit. The surface of DC has a bolt in the housing. This helps whole unit lay flat on the shelf.
I bought two heavy duty shelf brackets from the home store and placed a cleat on the lighter side of the DC unit.
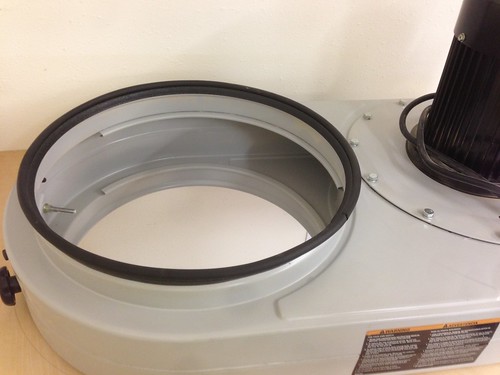
Next, installing the Wynn filter. I purchased the 35A series filter with “blend” paper filter. I decided to go more economic and not get the nano. I’m just a weekend ww. The blend will be a huge upgrade for me! I also purchased the edge trim gasket that they sell (ETG-55) for my specific DC application. Here’s the gasket installed on the rim of my DC. Easy install – snipped it to length with scissors and slipped it on the rim.
Next was to install the filter on the DC with gasket in place. The gasket definitely makes the whole unit very snug – a good thing. It took a touch of finessing to get it in place. Had to kind of pry some of the gasket out so it was just being compressed down by the filter. Great fit though.
Now to secure the filter. I used the supplied turnbuckles from Wynn. As per their website info, with the Delta DC I was able to attach them from inside. I had to bend the rim a bit on the filter to achieve the needed clearance for the hooks. I also bent the angle of the hooks just a touch for it to work. Not too hard…
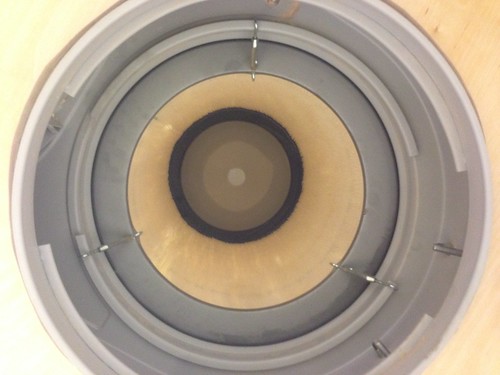
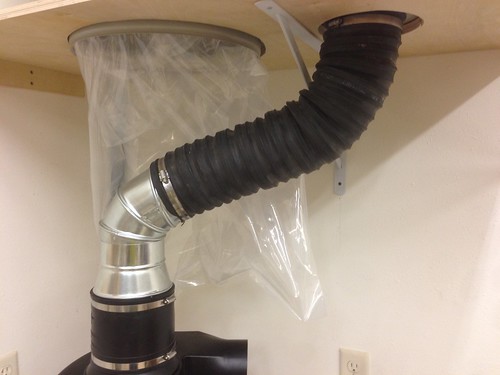
Here’s the unit with filter and bag. I choked up on the bag some. I figured I no longer need the bag for chip collection, so I wanted greater clearance under the unit.
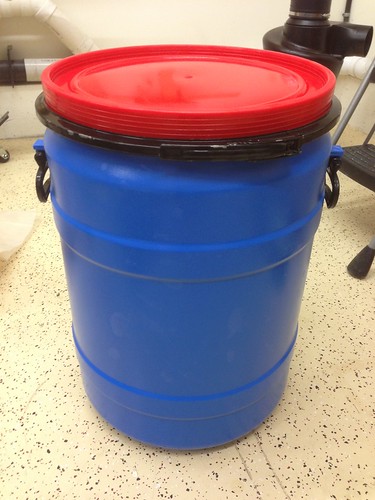
Now let’s prep the chip container. I called around town and found a place that sells these. I wanted the 50 gal one, but it did not have the removable lid. This one is 30 gal. Works for me.
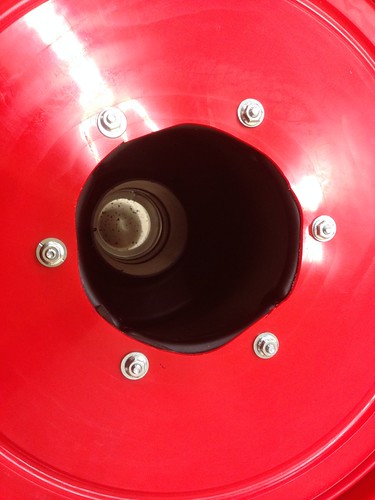
Here is the inside of the lid. I was happy to fine a little rubber gasket in there. Should provide a good seal.

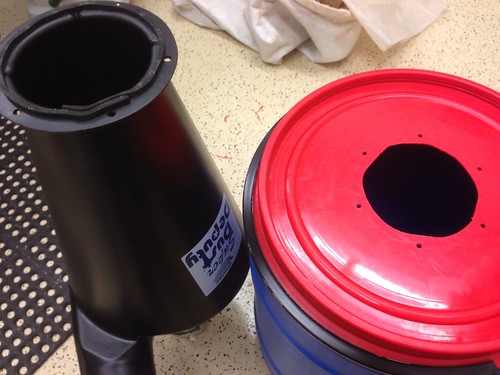
Here’s the hole I cut with a jigsaw. The SDD came with a template. Also showing here how I squeeze the lid clamp together to open it. Very slick.

Next to drill the holes for the bolts for the SDD (also on the template). Also installed the little gasket material on the underside of the SDD that comes with it. It has a sticky edge to apply to surface. Easy peasy.
SDD is now bolted to my lid. Appears like a great seal with the suppled gasket material.
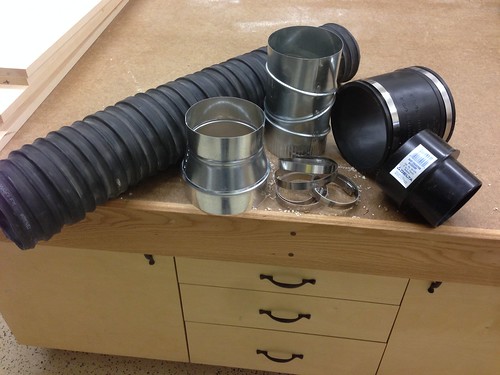
Now on to the meat and potatoes of the whole thing. Hooking it up. I hate DC fittings!! All the companies out there do not talk with each other. So frustrating. After FIVE trips to Lowe’s and two trips to my ww supply store in one day, I finally arrived at a solution. Ugh!!!!
Here’s the parts that I bought for my application (sorry, don’t know proper names):
6” to 6” flex fitting
6” to 5” reducer
5” to 5” 90deg connector (has numerous adjustability)
5” to 4” reducer
clamps that actually fit the required diameter (yep – 1 extra trip to store for correct size clamps). I found these clamps at my ww supply store (not Woodcraft, a local shop). They’re great – have wide adjustability.
5” hose (This was the hardest to figure out. I finally found some at an equip supply store. Very heavy duty stuff. $35 for 8 ft length. Better yet, they had a cutoff for me. $7 for this one – I’ll take it!)
Alright, 6” flex connector goes on 6” hole on SDD. Next is 6”-5” reducer.
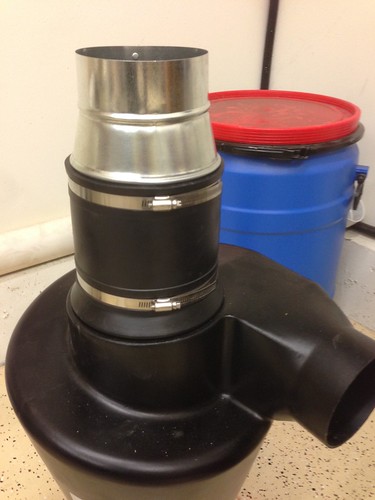
Next, attach 90deg flex connector to reducer. Attached 5” hose to 5” 90deg fitting and bottom of DC motor.
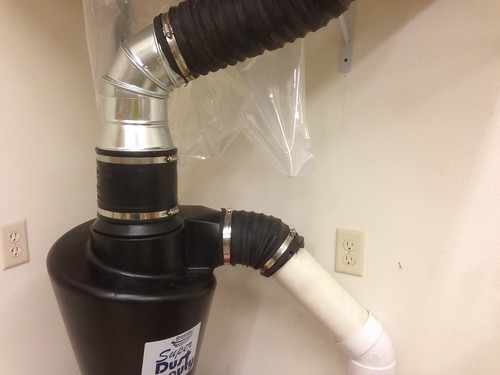
Next, attaching infeed side of SDD to my existing pipe runs. I added a couple fittings to my existing pipe to get the pipe where it needed to be. You’ll see here I have a 90deg angle there. This is my only 90deg in my whole system. I have 45deg angles everywhere else. I’ve heard 90deg elbows may create more turbulence, etc. So I avoided them. To make this job easier, I did this one and only 90deg. I think it’ll be OK though, dust coming from that side of my shop are just my drill press, band saw, and router table. My main chip producers: TS, jointer, planer, come from the other way.
I placed a small section of 5” hose to SDD. Then attached 5”-4” reducer. I was pleased to find the 4” side of reducer slipped perfectly into my 4” S/D PVC.
Zoom out a little…
Add my DC remote unit…
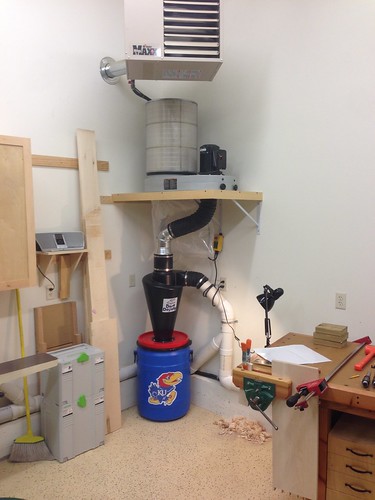
SO… HOW DOES IT PERFORM? I LOVE it! Here’s a pic of the bag. There’s probably about 4” of chips/dust in the container. The bag has about a tablespoon in it. NICE!!!! Now, I’m guessing there is some dust stuck up above in the pleated filter, but I’m guessing it’s minimal. And apparently a little dust up there is OK – helps with performance of the filter according to their website. I haven’t had to empty the container yet. But man, it will be so much easier than before with the bag. Also, with the flex tubing on the infeed and outfeed sides of the SDD, it has a little give when removing the container lid.

Soooo, I’m a big Kansas Jayhawks fan. I just happen to stumble upon a container with KU colors. Well, a quick trip to eBay, and now amazingly the Jayhawks are in the dust collection business. YOU BET!!!

Lastly, I added a little trim to the DC shelf. I plugged the screws with walnut plugs as it matches everything else in my shop. Put a little wiping varnish on the trim piece. Why walnut plugs and finish? Because that’s what we woodworkers do. Lol!!!
Source: LumberJocks.com
Setting Up Delta DC w/ Wynn Filter & Super Dust Deputy
No comments:
Post a Comment